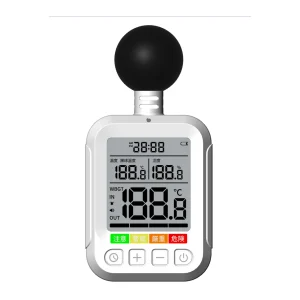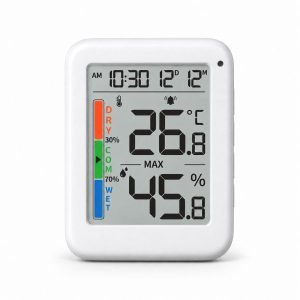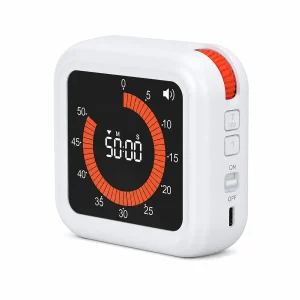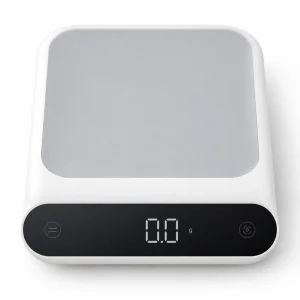
Tooling and Custom Moulding for Your OEM Thermometer Hygrometer
Why Custom Moulding Makes or Breaks Your Thermometer Hygrometer

Proper thermal isolation in the housing ensures the sensor measures the ambient room, not the device’s internal heat.
Most thermometer hygrometer failures don’t happen at the sensor; they happen in the plastic. If your housing doesn’t isolate the sensor from the heat of the internal PCB or the battery, you aren’t measuring the room—you’re measuring the device’s own fever. Anyone who has spent time on a production line knows that a generic, off-the-shelf shell is a shortcut that usually ends in a high return rate. If you want a product that actually holds its calibration, you have to stop looking at the housing as a container and start looking at it as a precision instrument.
Most projects hit a wall when they move from a 3D-printed prototype to a steel mould. A generic mould might save you a few thousand dollars upfront, but it locks you into a design that wasn’t built for airflow or environmental sealing. When we review CAD files at YGhao, we aren’t just checking if the parts fit; we are looking for heat-soak paths and air-dead zones that will ruin your accuracy in the field. If your supplier isn’t running a mould-flow analysis to show you exactly where the plastic will cool and how the sensor will be isolated, they are just guessing.
Don’t treat your first sample as a beauty contest. It’s a structural audit. If the housing doesn’t seal properly or the sensor is sitting too close to the heat-generating components, no amount of software calibration will fix the drift. A custom mould is a long-term asset, not a one-time expense; it is the only way to ensure your device performs in the real world the same way it did in the lab. If you can’t see the mould-flow report before the steel is cut, you aren’t buying a custom product—you’re buying a gamble.
Technical Specs for Custom Sensor Housing
What actually separates a precision thermometer hygrometer from a cheap plastic shell that just traps heat? It comes down to the thermal bridge. If your housing doesn’t isolate the sensor from the internal PCB or the battery, you aren’t measuring the room—you’re measuring the device’s own heat. A custom mould is a long-term asset, but if you aren’t reviewing the mould-flow analysis before the steel is cut, you’re just gambling on the device’s accuracy.
When we look at housing specs, we have to balance material performance against the reality of the production line. Standard ABS works for basic consumer units, but if your device is going into an industrial environment or sitting in direct sunlight, you need the heat deflection and UV stability of a PC/ABS blend. Precision is the other half of the battle: a 0.1mm deviation in the internal airflow channel creates enough turbulence to make the sensor look sluggish.
| Material Grade | Dimensional Tolerance | Tooling Lead Time | Unit Cost at Scale | Best Application |
|---|---|---|---|---|
| Standard ABS | ±0.15 mm | 30 days | Low | Indoor consumer use |
| PC/ABS Blend | ±0.10 mm | 40 days | Medium | Industrial/Outdoor |
| Flame-Retardant PC | ±0.05 mm | 50 days | High | High-heat/Safety-critical |
Don’t get distracted by high-gloss finishes. They look great in a render, but they show every micro-scratch and assembly imperfection the moment they hit a real-world environment. A light-textured matte finish is almost always the smarter choice for industrial use; it hides the inevitable wear of a field-deployed device and feels more consistent. If a supplier can’t provide a texture sample that matches your environment, they aren’t thinking about the product’s lifecycle—they’re just thinking about the injection cycle. Ask for the sample before you sign the PO, or you’ll be the one explaining the scuffs to your customer.
Choosing Your Production Path: Startup vs. Industrial Scale

Scaling to high-volume production requires hardened steel tooling that guarantees repeatability and low defect rates.
If you are three weeks out from a user test, your biggest enemy isn’t the unit price—it’s the cost of being wrong. Sinking five figures into hardened steel before you know if the sensor placement actually works in the field is a gamble most startups can’t afford. For the first 500 units, look at aluminum tooling or high-grade master patterns for silicone casting. These methods give you enough fidelity to validate the ergonomics and thermal isolation without locking you into a design that might need a tweak. If you commit to high-pressure injection steel before the design is battle-tested, you are paying to be stuck with your mistakes.
When you scale to 10,000 units, the math changes. At this volume, a $0.05 variance in labor or a 1% increase in scrap rate due to a worn-out, low-cost mould becomes a massive margin leak. This is where multi-cavity hardened steel pays for itself. The upfront capital is higher, but it is amortized over hundreds of thousands of cycles and provides the repeatability needed to pass CE or RoHS compliance audits without a fight. A seasoned buyer knows that at this scale, the tooling isn’t just a container for the electronics; it is the primary driver of your defect rate.
Many buyers find a middle ground by standardizing the internal sensor platform while customizing only the external housing. By keeping the PCB and calibration logic identical across product lines, you bypass the most expensive part of the R&D cycle—sensor validation. This approach lets you launch a proprietary-looking device in roughly 60% of the time it would take for a full-custom build. YGhao often helps clients design modular tooling that starts with a basic shell and upgrades to a high-cavity industrial mould as volume dictates. The most efficient production path isn’t the one that builds everything from scratch; it is the one that identifies which components require precision and which ones simply require a consistent aesthetic.
Choose your tooling based on your current defect tolerance, not your future sales projections.
Where Thermometer Hygrometer Tooling Usually Fails
Tooling failure in thermometer hygrometer production is rarely a sudden event; it is almost always a result of ignoring how plastic behaves once it leaves the injection nozzle. If the mould design doesn’t account for the specific shrinkage of your chosen resin, the housing will warp just enough to ruin the sensor’s air gap. That is where most projects lose their accuracy before the first unit is even assembled.
| Failure Point | The Hidden Cost | What to Demand Before PO |
|---|---|---|
| T1 Sample Rush | Hidden shrinkage and warping | Full T1 inspection report + 48-hour thermal drift test |
| Airflow Neglect | Sensor bias from internal heat | Computational Fluid Dynamics simulation report |
| Cooling Cycle Cut | Brittle plastic and hairline cracks | Documented cooling time vs. material spec sheet |
If the sample passes, production will too.
A prototype is often built with soft tooling or 3D-printed parts that ignore the thermal expansion of production-grade ABS. When you move to hard steel, shrinkage rates shift; if the supplier hasn’t accounted for this in the mould design, the housing will warp. A sample is a snapshot, not a guarantee of process stability. Always demand a T1 sample report—the first shot from the actual production mould—and verify that the dimensions match the final spec, not just the initial prototype.
Ignoring the airflow path is a minor design choice.
In a thermometer hygrometer, the housing is the sensor’s environment. If the design traps heat from the internal PCB or battery, the device will report a higher temperature than the room. This is where most quotes break; the supplier focuses on the aesthetic shell and ignores the internal thermal bridge. At YGhao, we run Computational Fluid Dynamics to ensure the sensor is isolated from the device’s own heat. If your supplier can’t show you how the air moves through the housing, they are building a thermometer that measures its own battery.
MOQ and lead time are fixed numbers.
Buyers often treat MOQ as a static price-break, but it is actually a function of tooling depreciation and assembly complexity. If you are rushing the T1 sign-off to hit a launch date, you are likely skipping the stress testing that catches long-term assembly defects. A supplier offering a Cooling Cycle Cut to speed up the injection process is creating internal stresses that lead to hairline cracks. Is your supplier ready to provide the full inspection data for a real production batch?
How to Audit Your Moulding Partner

Auditing your moulding partner’s quality control processes is essential to maintaining strict dimensional tolerances.
How do you verify if a factory actually owns the injection moulding machines they claim to run, rather than just acting as a middleman? It is a common trap in the industry: a supplier quotes a competitive price, but they are actually subcontracting the moulding to a third-party shop. This creates a disconnect where you lose control over the production schedule and, more importantly, the quality of the housing. If your thermometer hygrometer housing isn’t moulded to precise tolerances, the sensor will drift because it is picking up heat from the internal components rather than the ambient air.
| Audit Item | Expected Evidence | Red Flag | Responsible Party |
|---|---|---|---|
| In-house Moulding | Video of machines with company branding | ‘We have partners’ or ‘Off-site’ | Supplier |
| Tooling Ownership | Signed contract stating client ownership | ‘Proprietary’ or ‘Shared’ claims | Supplier |
| Sensor Integration | Case studies of PCB-housing fitment | No history of electronics integration | Supplier |
| QC Documentation | Batch-specific Cpk/Ppk reports | Verbal ‘passed’ assurances | YGhao/Supplier |
When you are reviewing a quote, look closely at the tooling ownership clause. If the contract is vague, the supplier effectively holds your product hostage; if you need to move production later, they may claim the mould is ‘incompatible’ with other machines. You need a contract that explicitly states the mould is your asset and that you have the right to move it. Beyond the legal side, check their technical history with sensor integration. A shop that only makes simple plastic parts will struggle with the 0.1mm tolerances needed for a sensor-integrated housing. If they cannot show you a past project where they managed the fitment of a PCB inside a housing, they are learning on your dime.
Getting Your Custom Project Started
Moving from a CAD file to a finished thermometer hygrometer involves more than just selecting a sensor; it requires verifying that the housing geometry won’t trap heat from the PCB or battery. If the airflow isn’t modeled correctly during the tooling phase, the device will report internal heat rather than ambient conditions. We typically start by running a thermal airflow simulation on your design to catch these bottlenecks before the steel is cut. This is the point where most projects either save weeks of rework or lock in a design flaw that no amount of software calibration can fix.
Our process focuses on the practical realities of the shop floor, where high-speed injection moulding can introduce subtle warping that ruins sensor accuracy. We handle the full OEM/ODM integration, from sensor calibration to finished retail packaging, ensuring the final assembly is as stable as the prototype. If you have existing CAD files, send them over for a technical review; we can usually spot the thermal risks in a single afternoon. You can download our latest product catalog or book a 20-minute technical consultation with our engineering team to discuss your specific requirements for Getting Your Custom Project Started Now.