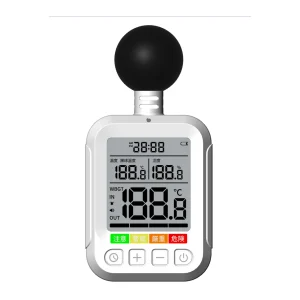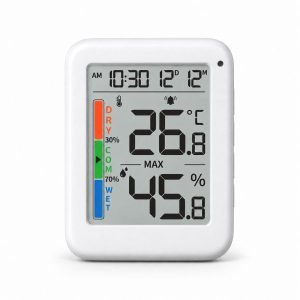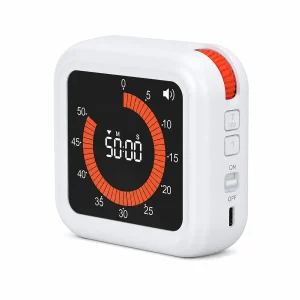
Custom Digital Clock Selection Criteria: Evaluating SMT Capacity, QC Gates, and RMA Policies
Why Off-the-Shelf Clock Modules Drift and Fail in Custom Smart Home Enclosures
A hardware quality engineer boots up the thermal test chamber at 7:00 AM, only to find the smart home hub prototypes have drifted out of sync with the network clock by 14 seconds after just 48 hours. It is a typical Monday morning failure: a cheap catalog module that performed perfectly on an open test bench fails the moment it is packed into a tight, unvented housing. The root of the issue is a physical division in how these clocks are sourced. IoT device project managers usually look for bare surface-mount (SMT) clock boards that can hide behind dense mainboards, whereas appliance designers require highly visible, integrated custom digital clock layouts—like segment-LED or static LCD glass plates—that act as the user interface. Sourcing a standard, catalog-bought module to satisfy both requirements typically leads to structural mismatch and field returns.
Once sealed inside a compact housing, thermal drift and electromagnetic interference (EMI) slowly skew timekeeping. Off-the-shelf modules rely on low-cost 32.768 kHz tuning-fork crystals calibrated for exactly 25°C. In real-world operation, adjacent power regulators and Wi-Fi antennas quickly push internal temperatures past 45°C. Without precise crystal impedance matching, this heat causes the crystal’s resonant frequency to slide down its parabolic curve, losing minutes every week. High-frequency RF noise from neighboring antennas also couples directly into unshielded, high-impedance clock traces when PCB layout is neglected. Physical alignment presents another hurdle: a tiny 0.2 mm shrinkage deviation in an injection-molded ABS/PC bezel shifts the display window, causing light bleed or putting mechanical stress on the LCD glass.
To resolve these layout and mechanical risks early, teams partner with Shenzhen-based OEM/ODM specialists like YGhao. Handling both raw PCB fabrication and custom crystal tuning, they specialize in aligning delicate electronic components within Custom Smart Home Enclosures. Designing the display bezel and the timing circuit under one roof ensures that the crystal impedance is matched to the actual operating environment before tooling begins. Before signing off on any clock component, always demand the crystal’s frequency-versus-temperature curve plotted alongside the enclosure’s actual thermal profile under load.
Comparing Quartz Crystals, Display Drivers, and SMT Line Tolerances

Rigorous SMT line controls are critical to ensuring high-pin driver ICs and quartz crystals survive thermal expansion without drift or failure.
How do we calibrate SMT Line Tolerances Which cause display drivers to fail and quartz crystals to drift?
In custom clock design, timing drift and display line failures are rarely separate issues—they are almost always thermal problems. When a high-brightness multiplexed display draws up to 80 mA, the heat generated inside a sealed plastic enclosure can easily push internal temperatures past 40°C, causing a cheap ±20 ppm Standard Tuning Fork Quartz crystal to warp its frequency and lose minutes a month. Upgrading to an active ±2 ppm TCXO rated for -40°C to 85°C solves the drift, but it demands significantly more Power Draw and changes your PCB layout constraints. Beyond timing, high-pin-count driver ICs are notoriously sensitive to reflow profiles; if your manufacturer does not run rigorous Automatic Optical Inspection alongside 3D solder paste checks, thermal expansion will shear those delicate pins under load, creating dead display lines.
| Display Configuration | Interface Protocol | Drift Limit | Power Draw | SMT Solder Inspection Standard | Target Application |
|---|---|---|---|---|---|
| Segmented LCD | I2C / Direct Drive | ±20 ppm (Standard Tuning / Fork Quartz) | 0.01 – 0.05 mA | 2D Automatic Optical Inspection | Powered Smart Thermometers |
| Custom Backlit LCD | SPI | ±2 ppm (Active TCXO, stable from -40°C to 85°C) | 0.50 – 1.50 mA | 3D Solder Paste Inspection & 3D AOI | Security Panels / Industrial Wall Units |
| Multiplexed LED | SPI / Shift Register | ±20 ppm (Standard Tuning Fork with physical heat shields) | 15.0 – 80.0 mA | 3D SPI, 3D AOI, and Inline X-Ray for QFN | Mains-Powered Smart Appliances |
Timing Accuracy and Solder Joint Integrity
When auditing a factory’s component selection, the board-level assembly standards are just as critical as the silicon specs. A driver IC package like a QFN (Quad Flat No-lead) has pads tucked underneath the chip body, making standard visual checks useless for catching microscopic voiding or cold joints. Over weeks of thermal cycling in the field, these hidden voids crack under expansion stress, leading to flickering segments or completely dead display rows. Experienced manufacturers like YGhao use automated 3D solder paste inspection (SPI) before the boards enter the reflow oven, followed by inline 3D automatic optical inspection post-reflow to verify wetting angles and volume. If a supplier cannot provide automated SPI and post-reflow inspection logs for high-pin drivers, you are effectively paying to test their yields in your customers’ hands. When sourcing custom digital clocks, always prioritize suppliers who match active thermal-compensated oscillators with automated 3D solder paste verification to ensure timing stability and display line survival under real-world operating heat.
Enclosure Integration: Designing Clock Boards Around RF Shields and Thermal Budgets
A QC engineer at a Shenzhen partner facility sits in front of a near-field probe at 6:00 AM, tracing a rogue 32.768 kHz harmonic that is quietly blinding a 2.4 GHz receiver inside a sealed aluminum housing. When you pack a custom digital clock into a dense smart home device, the physical housing ceases to be a simple protective shell; it turns into an RF resonant cavity and a thermal trap. Standard oscillators that run cool on an open evaluation board will drift or throw electromagnetic interference once boxed up behind shielding cans. If a supplier treats the board layout and mechanical packaging as separate, isolated tasks, the design usually fails right at the finish line during compliance testing.
High-Heat Layouts Running off the Mains
For a wall-mounted, Mains-Powered Smart Thermostat. This layout packs high-speed SPI display drivers, multi-layer SMT boards, and acrylic light guides into a tight space. Because the internal transformer generates constant local heat, a standard quartz crystal will drift rapidly, causing the system clock to fall out of sync with the local mesh network. Solving this requires isolating the oscillator on a milled PCB thermal island, and dropping a grounded metal shield over the high-speed display lines to isolate RF noise from the Thread or Wi-Fi antennas. We tackle this by running full thermal-imaging simulations during the initial board layout phase, validating exactly where the heat plumes rise before any plastic tooling is cut.
Mechanical Shock in the Battery Applications
For the ultra-compact, Battery-Powered Sleep Monitor. This wearable relies on a custom reflective LCD drawing microamps, squeezed into a sonic-welded enclosure where clearance is down to tenths of a millimeter. During ultrasonic assembly, the intense vibrational energy from the welding horn can fracture the quartz blank of a standard SMT crystal, leaving you with dead-on-arrival units. The fix is floating the timing circuit away from the weld joints on shock-resistant resonators, and using fast-turn CNC-milled plastic enclosures to test physical clearances and mechanical energy transfer in our facility. It lets us tweak the internal layout and verify survival before committing to the final tool steel.
Keep in mind that if your factory cannot run CNC enclosure validation and board-level layouts concurrently, you are risking expensive mold modifications when the first real production samples fail.
Four Common Procurement Traps in High-Volume Custom Clock Manufacturing
Unmonitored component shifts and skipped QC gates on the factory floor will ruin a bulk custom digital clock order long before the cargo arrives. High-volume assembly failures are rarely due to conceptual design errors; they stem from minor component substitutions and bypassed inspection steps during Volume Custom Clock Manufacturing.
“A standard 32.768 kHz crystal keeps perfect time in a sealed case.”
Sealed enclosures trap heat from active display drivers, pushing internal temperatures past 45°C. Quartz tuning-fork crystals are physically cut to oscillate precisely at 25°C; as ambient heat rises, their frequency drifts down a parabolic curve. This shifts timing accuracy by minutes per month unless you specify an active Compensated Crystal Oscillator or map the thermals before freezing the PCB layout.
“General factory-level certificates are enough for US and EU customs.”
Port inspectors do not accept facility-level ISO framework certificates as proof of compliance. US and EU customs demand batch-specific RoHS, REACH, and FCC or CE test reports for the actual custom digital clock electronics assembly. If your supplier cannot present testing logs tied directly to your active production lot number, customs can impound the shipment indefinitely at your expense.
“Functional testing at the end of the line catches any soldering errors on the display.”
A quick power-on test at the packaging bench only proves the display segments blinked for a fraction of a second. It misses cold solder joints and pin bridges that will fracture during ocean transit or thermal expansion cycles in the field. Bypassing Automated Optical Inspection (AOI) directly after SMT reflow ensures loose pins and dark segments after shipping; demand SMT-line AOI logs for batch release.
“Once prototype samples are approved, the sub-components are locked for production.”
Some suppliers swap critical parts—like trading a brand-name real-time clock chip for a cheaper local clone—mid-production to pad margins. These unauthorized changes introduce timing drift and power spikes that never appeared in your golden sample. Protecting your production run requires making the supplier document and guarantee component lot codes on the final shipping invoice.
The cheapest quote on a custom digital clock is almost always financed by quietly skipping these hidden quality gates on the factory floor.
What to Check on the Factory Floor: Auditing SMT and Assembly Lines

Simulating thermal profiles and isolating the oscillator ensures stable custom digital clock performance within sealed enclosures.
Even if you resolve thermal budgets and RF shielding on the PCB layout, those board-level designs fail if the physical SMT line introduces micro-cracks or cold solder joints. Transitioning a custom digital clock from design to mass production requires moving past paper guarantees and inspecting the actual SMT and Assembly Lines while the factory is running.
The Floor Audit Checklist: Physical Evidence vs. Paper Claims
The auditor must bypass the conference room and demand live data straight from the machine terminals. If a supplier cannot pull up digital logs on a random Tuesday, those quality processes probably do not exist.
| Audit Category | Verification Protocol | Physical Evidence Required | Supplier Red Flags | YGhao Operational Standard |
|---|---|---|---|---|
| SMT Traceability | Verify Solder Paste Inspection and match component reels to production batches. | Digital logs showing 3D Solder Paste Inspection (SPI) height distribution and barcode scans linking component reels to the batch run. | Manual paper logs for reel changes; SMT lines running without active SPI digital tracking. | 100% automated barcode tracking at the feeder level; SMT runs are locked to the MES batch ID. |
| Environmental Aging | Check that displays undergo high-humidity/temperature chambers to test polarizer adhesion. | Active logs of displays running at 60°C and 90% Relative Humidity to verify display durability under load. | Displays stored on open shelves with no power; empty environmental chambers; manual logs with zero digital timestamps. | 72-hour continuous testing inside the environmental chamber at 60°C and 90% Relative Humidity before final casing assembly. |
| Enclosure Controls | Inspect mold cooling cycles and pressure logs to prevent warpage on the custom digital clock’s plastic bezel. | Injection molding machine controller logs showing hydraulic clamping pressure curves and cooling times. | Operators cutting cooling cycles short to boost daily yield, resulting in warped bezels and flash. | Hard-locked molding parameters with automated sensors to keep dimensions within ±0.1 mm tolerances. |
| Change Control (ECO) | Test ERP lockdown of the bill of materials (BOM) to prevent unauthorized component swaps. | System-generated ECO history logs showing authorized engineering sign-offs. | Floor managers swapping out display drivers or crystals without formal engineering approval when stocks run low. | Automated BOM lock in ERP; unauthorized component changes instantly halt the active SMT line. |
When sourcing custom digital clocks, relying on “trusted partnerships” is a recipe for field failures. A true OEM/ODM partner does not mind you looking at their machine screens; they design their workflows around the expectation that their clients know what a good solder joint and a stable molding cycle look like. By enforcing these exact standards on our own lines, we ensure that the timing modules we build do not drift, warp, or fail after they ship.
From Spec to Container: Managing Tooling Timelines, Quality, and RMA Agreements
While resolving thermal profiles and board layouts on paper is only half the battle, the real friction starts when translating that 3D model into hard steel tooling. Tooling schedule slippage is where most custom digital clock projects lose momentum, usually because a draft angle was miscalculated or wall thickness variations were ignored. Cutting a custom plastic injection mold requires 35 to 45 days. This duration is non-negotiable if you want properly engineered cooling channels that prevent the wide display bezel from warping. Once we clear T1 samples and begin plastic injection, the boards move to high-speed SMT lines for passive component and multi-pin display driver placement. Ultrasonic welding then seals the enclosure, followed by a non-negotiable burn-in cycle on our dedicated racks to force infant-mortality failures in the LEDs or LCD drivers before they go into a shipping container.
To protect your margins at scale, we back this production sequence with systematic, reel-level batch tracing and a clear 12-month hardware warranty. This traceability is locked into our quality and RMA agreements. While managing tooling timelines is a joint effort, we eliminate finger-pointing by using physical telemetry and component-level tracking if a variance shows up in the field. To avoid the tooling delays that sink launch schedules, let’s look at the CAD files before you commit budget. Send us your 3D STEP or schematic files, and our engineering team will run a non-binding design-for-manufacturability (DFM) review to check your enclosure clearances, verify display driving modes, and flag potential SMT or mold issues before steel is cut.